


Intercom installation is one of the most practical upgrades Australians consider when they want safer entry, easier visitor screening and better control over doors, gates or shared access points. From my experience reviewing security setups for homes, strata buildings, offices and small commercial sites, the best results come from matching the intercom type to the building, cabling, network and daily use case before any device is installed.
A modern intercom can be simple or advanced. It might be a basic audio handset at a front door, a video intercom at a gate, an IP-based system connected to mobile phones, or a multi-tenant unit for an apartment building. However, the goal is usually the same: confirm who is at the entry point, communicate clearly and release access only when appropriate.
This guide explains intercom installation in plain English for Australian readers. It covers system types, planning, cabling, compliance tasks, cost factors, installation steps, common mistakes and questions people often ask before booking a professional installer.
Table of Contents
- What is intercom installation?
- Why Australian properties install intercoms
- Main types of intercom systems
- Wired vs wireless vs IP intercom installation
- Key parts of an intercom system
- Planning an intercom installation in Australia
- Compliance and admin considerations
- Step-by-step intercom installation checklist
- Intercom installation cost factors
- Comparison table: home, apartment and business systems
- Common mistakes to avoid
- Maintenance and troubleshooting
- People Also Ask
- Expert Q&A
- Conclusion
What Is Intercom Installation?
Intercom installation is the process of fitting and configuring an audio, video or IP-based communication system so occupants can speak with visitors and, where required, unlock a door or gate remotely. In Australia, it may involve device mounting, cabling, network setup, power connection, testing and basic user training.
Why Intercom Installation Matters in Australia
Across Australia, intercom systems are used in detached homes, townhouses, apartment buildings, schools, warehouses, offices, medical suites and retail sites. They are popular because they sit at the point where convenience and security meet.
For a homeowner, an intercom can help screen visitors before opening the door. For a business, it can reduce unauthorised entry and help reception staff manage deliveries. For strata buildings, it gives residents a structured way to identify visitors and release a foyer or gate without walking downstairs.
However, intercom installation is not only about putting a panel on a wall. A good result depends on the property layout, cable pathway, door hardware, internet reliability, power supply and the way people will actually use the system. For example, a video intercom at a long driveway gate may need different cabling and weather protection compared with a small office intercom beside a glass entry door.
Because of this, it helps to treat intercom installation as a small security project rather than a quick gadget purchase.
Main Types of Intercom Systems
Audio Intercom Installation
An audio intercom lets visitors and occupants speak to each other. It usually includes an outdoor door station and an indoor handset or speaker unit.
Audio systems suit simple entry points where video is not required. They are often used in older apartment buildings, small offices, back-of-house doors and budget-conscious residential projects.
The main advantage is simplicity. There are fewer components, less bandwidth demand and a lower device cost. However, users cannot visually confirm the visitor. Therefore, audio-only systems are less suitable where visitor verification is important.
Video Intercom Installation
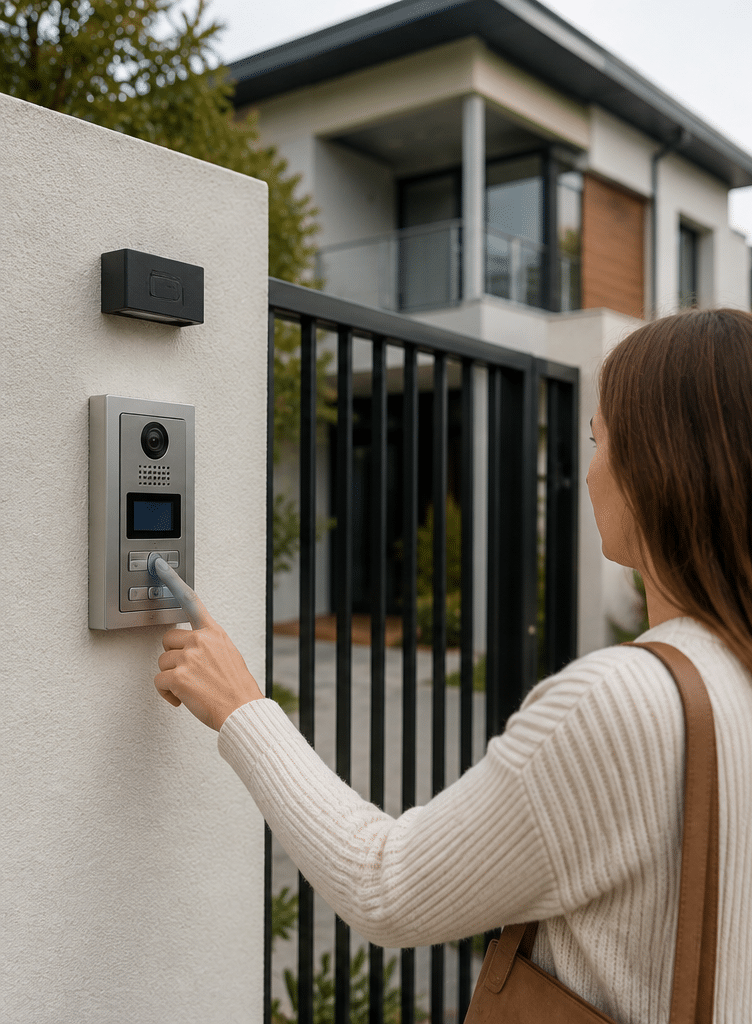
A video intercom adds a camera to the outdoor station and a screen or app-based viewing option for occupants. This gives users a clearer view of visitors, deliveries and entry activity.
Video systems are common in Australian homes, apartment buildings, warehouses and commercial premises. They are especially helpful at front gates, reception entries and loading areas where staff need visual confirmation before unlocking access.
From my experience, video intercom installation works best when lighting, camera angle and mounting height are planned early. A high-quality unit can still perform poorly if it points into glare, sits too low or faces a dark entry with no supporting lighting.
IP Intercom Installation
An IP intercom uses a data network rather than only traditional point-to-point wiring. It can connect to network switches, mobile apps, cloud services, access control systems and building management platforms.
IP intercom installation is often used in new builds, larger homes, commercial sites and apartment complexes because it offers more flexibility. For example, a business may want calls to ring at reception during office hours and then forward to a manager’s phone after hours.
The trade-off is that the network must be stable. Poor Wi-Fi, weak mobile reception or overloaded switches can affect call quality and reliability. Therefore, network design matters.
Wireless Intercom Installation
Wireless intercom systems reduce the need for long cable runs. They may use Wi-Fi, radio frequency or mobile network connectivity, depending on the model.
Wireless options are useful when trenching, wall chasing or retrofitting cable is difficult. However, they still need power, correct mounting and reliable signal. In brick homes, metal gates, concrete buildings and large sites, wireless performance can vary.
As a result, wireless intercom installation should include a signal test before final mounting. Otherwise, users may experience delays, dropouts or poor video quality.
Apartment Intercom Installation
Apartment intercoms usually support multiple units. A visitor selects a unit number, speaks to the resident and the resident can release the common entry door.
These systems can be analogue, digital or IP-based. In Australia, strata approval, resident communication and access scheduling often become as important as the hardware. For example, an installer may need access to risers, communications cupboards and common areas.
For strata buildings, the best intercom installation process includes planning with the owners corporation, building manager and residents before work begins.
Wired vs Wireless vs IP Intercom Installation
Choosing the right connection type is one of the most important decisions. Each option has strengths and limits.
| Intercom type | Best suited to | Main benefits | Main limitations |
| Wired intercom | Homes, offices, apartments and gates where cabling is practical | Reliable, stable and generally better for long-term use | May need more labour for cable runs |
| Wireless intercom | Retrofitting, rentals, temporary sites or difficult cable paths | Less invasive and faster in some cases | Signal issues can affect performance |
| IP intercom | New builds, commercial sites, smart homes and multi-door systems | Flexible, scalable and app-friendly | Depends on network quality and configuration |
| GSM/mobile intercom | Remote gates, rural sites and places without fixed internet | Can call mobile phones directly | Requires mobile coverage and ongoing SIM costs |
| Hybrid intercom | Sites with mixed old and new infrastructure | Can reuse some existing parts | Needs careful compatibility checks |
For most permanent Australian homes and businesses, wired or IP-based intercom installation is usually preferred when cabling is practical. However, wireless and GSM options can be very useful for gates, sheds, rural properties and retrofits.
Key Parts of an Intercom System
A complete intercom system may include several components. Understanding these parts helps you compare quotes and avoid under-specified installations.
Door Station or Gate Station
This is the outdoor unit visitors use. It may include a call button, microphone, speaker, camera, keypad, card reader or directory.
For outdoor use, the unit should be weather-resistant and suitable for the site. In coastal areas, corrosion resistance may matter because salt air can affect exposed hardware over time.
Indoor Monitor or Handset
This is the device inside the building. It can be a wall-mounted screen, audio handset, desk station or app-based receiver.
In homes, a monitor near the kitchen or hallway is common. In offices, reception may need a desk station. In apartments, each unit may have a handset or app connection.
Electric Strike, Maglock or Gate Relay
If the intercom releases a door or gate, it needs a lock interface. Common options include electric strikes, magnetic locks and gate controller relays.
This part must be planned carefully. The door type, fire egress needs, access control requirements and power supply can affect the correct hardware choice.
Power Supply
Intercom systems need power. Some IP systems use Power over Ethernet, known as PoE, while others use separate low-voltage power supplies.
Power planning matters because unstable power can cause random faults. Also, backup power may be useful for businesses or shared residential buildings.
Cabling and Network Equipment
Cabling may include data cable, low-voltage cable, fibre, gate cable or existing building cabling. Networked systems may also need switches, routers and secure configuration.
The Australian Communications and Media Authority cabling provider rules explain that registered cablers must perform communications cabling work covered by the rules. In practical terms, this is why many Australian intercom projects should be handled by appropriately registered or licensed trades rather than treated as DIY.
Mobile App or Cloud Service
Some intercoms allow calls to mobile phones. This can be convenient for homeowners, mobile managers and after-hours access.
However, app-based systems may rely on internet uptime, vendor cloud services and phone notification settings. Therefore, they should be tested under real conditions before handover.
Planning Intercom Installation in Australia
Good planning reduces cost blowouts and avoids frustrating compromises.
Start With the Entry Point
First, identify the door, gate or foyer where the visitor will press the call button. Then consider what the visitor can see, where they stand and whether the user inside can hear clearly.
A camera should capture the visitor’s face, not just the top of their head or a wide view of the driveway. Similarly, the microphone should not sit where wind, traffic or rain will overwhelm the audio.
Decide Who Answers Calls
Next, decide who should receive calls. In a home, it may be one indoor screen and two mobile phones. In a business, it may be reception first, then a warehouse office. In an apartment, it may be individual units.
This matters because the answer path determines the system type. A simple handset system may not suit a business that needs after-hours mobile answering.
Check Door and Gate Hardware
An intercom can communicate without unlocking anything. However, most users want remote release. Therefore, the door or gate hardware must be checked.
For a pedestrian door, the installer may assess the latch, frame, door closer and existing access control. For a vehicle gate, they may check the gate motor, controller, relay input and safety devices.
Assess Cable Pathways
Cable pathway is one of the biggest cost drivers in intercom installation. Running cable through a new build is usually easier than retrofitting it through finished walls, concrete, ceilings or underground conduit.
If the intercom is for a front gate, trenching or existing conduit may be needed. If it is for an apartment building, riser access and common-area permissions may be required.
Confirm Internet and Network Quality
For IP or app-based intercoms, the network is part of the security system. A strong device will still disappoint if the internet connection is unstable.
Before choosing a cloud-based or app-heavy intercom, check Wi-Fi coverage, router quality, mobile reception and whether the system needs a wired data point.
Consider Lighting and Weather
Video intercoms need enough light to capture useful images. Some units include infrared or low-light features, but lighting still matters.
In Australia, outdoor hardware may face strong sun, heavy rain, dust, insects and coastal air. Therefore, the mounting location should protect the device where possible without blocking the camera view.
Compliance and Administrative Considerations
This section is general information, not legal advice. For regulated work, use appropriately qualified professionals and check the rules that apply in your state, territory or building type.
Cabling Rules
Many intercom systems use communications cabling. According to the ACMA, the cabling provider rules promote safety and network integrity, and relevant communications cabling must be performed by a registered cabler with the right competencies.
For property owners, the practical takeaway is simple: ask whether the installer is appropriately registered for the cabling work involved. Also, keep records of the installation for future maintenance.
Electrical Work
Some intercom installation tasks involve low-voltage devices only, while others connect to power supplies, door hardware or building electrical systems. The Electrical Regulatory Authorities Council states that electrical work in Australia and New Zealand requires the correct electrical licence for the work.
Therefore, do not assume every intercom task is DIY-safe. If mains power, switchboards or fixed electrical wiring are involved, use a licensed electrician or appropriately authorised professional.
Privacy and Surveillance
Video intercoms can capture images, audio and entry activity. This makes privacy planning important, especially for businesses, strata properties and shared spaces.
The Australian Government business.gov.au guidance on video surveillance recommends clear signage at entrances and written notice to staff when surveillance devices are used. The Office of the Australian Information Commissioner guidance on security cameras also notes that residential cameras used in a private capacity are generally not covered by the Privacy Act, although state or territory laws may still apply.
In practical terms, avoid pointing a video intercom into a neighbour’s private area, bedroom window or unrelated public space where it is not needed. For workplaces, document what is recorded, why it is recorded, who can access it and how long it is kept.
Strata and Body Corporate Approval
For apartments, townhouses and shared buildings, intercom installation may affect common property. This can include foyers, gates, risers, external walls, cable pathways and communications rooms.
As a result, strata approval may be needed before work starts. The administrative process may include quotes, scope of works, product details, contractor insurance and resident notices.
Rental Properties
Tenants should check lease terms and obtain approval before installing fixed hardware. Landlords should also consider whether the system changes locks, access, wiring or common areas.
For rental homes, less invasive wireless or removable options may be possible. However, fixed systems should still be installed correctly and documented.
Numbered Checklist: Intercom Installation Steps
Use this checklist when planning a professional intercom installation.
- Define the access problem. Decide whether the main need is visitor screening, door release, gate access, delivery management, apartment entry or staff control.
- List all entry points. Include front doors, side gates, vehicle gates, reception doors, loading docks and shared foyers.
- Choose audio, video or IP. Match the system type to the user need, budget, cabling options and reliability expectations.
- Check door or gate hardware. Confirm whether the door needs an electric strike, maglock, gate relay or integration with existing access control.
- Assess cabling and power. Identify cable routes, conduit, data points, power supply locations and any need for registered cabling or electrical work.
- Review privacy and signage needs. For video intercoms, plan camera angles, signage, staff notices and access to recordings.
- Confirm network requirements. For app-based systems, test internet speed, Wi-Fi coverage, mobile reception and router reliability.
- Prepare an installation scope. Include equipment, labour, cabling, door hardware, testing, cleanup, user training and warranty details.
- Install and configure the system. Mount devices securely, connect cabling, configure users, set call routing and test door release.
- Complete handover. Get user instructions, admin credentials, maintenance advice and documentation for future service work.
Intercom Installation Cost Factors in Australia
Intercom installation costs vary widely because every property is different. The final price depends on hardware, labour, cabling, access equipment, door hardware and system complexity.
A simple residential audio intercom is usually cheaper than a multi-door video system. A gate intercom with trenching can cost more than a front-door unit because outdoor cable pathways and gate integration take extra time. A multi-unit apartment upgrade can cost significantly more because it may include many handsets, a directory panel, riser work and staged resident access.
Because prices change by brand, site and labour conditions, treat any online figure as an estimate only. The best way to compare quotes is to check what is included rather than only the total number.
Important cost factors include:
- Number of doors, gates or entry points
- Audio-only versus video capability
- Wired, wireless, GSM or IP system design
- Indoor monitors, handsets or mobile app licences
- Cable length, conduit and wall access
- Door strike, maglock or gate relay requirements
- Weatherproofing and vandal resistance
- Network switches, PoE equipment or power supplies
- Strata coordination or after-hours work
- Testing, training and warranty support
A cheaper quote may leave out door hardware, cabling repairs, app configuration or proper handover. Therefore, ask for a clear scope before approving work.
Comparison Table: Intercom Installation by Property Type
| Property type | Common intercom installation need | Recommended features | Planning notes |
| Detached home | Screen visitors at front door or gate | Video, mobile app, door or gate release | Check Wi-Fi, lighting and gate cable path |
| Townhouse | Manage front entry without complex wiring | Video or wireless option | Confirm body corporate rules if common property is affected |
| Apartment building | Let residents answer and release common entry | Multi-tenant directory, handsets or app access | Plan strata approval, riser access and resident notices |
| Small office | Control reception or staff entry | Video, desk station, access control integration | Decide who answers during and after business hours |
| Warehouse | Manage vehicle gates and loading areas | Gate station, loud audio, weatherproof housing | Allow for distance, noise and cable protection |
| Medical or professional suite | Separate public entry from private work areas | Video, controlled release, audit-friendly admin | Consider privacy, reception workflows and staff training |
| Retail site | Manage staff-only areas or deliveries | Audio/video intercom and controlled access | Use clear procedures for deliveries and after-hours calls |
How to Choose the Right Intercom Installer
The right installer should understand security, cabling, door hardware and user behaviour. A device-only approach is rarely enough.
Ask these questions before booking:
- Have you installed this type of intercom in similar Australian properties?
- Are you appropriately registered or licensed for the cabling or electrical work involved?
- Can you assess the door or gate hardware before quoting?
- Will you test camera angle, audio quality and door release?
- Does the quote include user setup and handover?
- What happens if the app, cloud service or network fails?
- What warranty applies to hardware and workmanship?
A good installer should explain the “why” behind the design. For example, they may recommend a wired data connection instead of Wi-Fi because the front gate is too far from the router. They may suggest a different mounting height because the camera would otherwise capture glare. These details matter.
For tailored support with Australian security upgrades, you can speak with the team at Eclipse Security’s practical security installation service.
Common Intercom Installation Mistakes
Choosing the Cheapest Device First
Many problems start when people buy a device before checking the site. The product may not suit the gate, door, Wi-Fi, power supply or desired call flow.
Instead, start with the property and the access problem. Then choose the hardware.
Ignoring Cable Pathways
Cabling is often the hidden part of intercom installation. If there is no usable pathway, the project may need conduit, roof access, trenching or alternative technology.
A site inspection can prevent surprises.
Poor Camera Placement
A video intercom should identify visitors clearly. However, glare, shadows, low mounting and wide angles can reduce image quality.
Test the view at different times of day where possible.
Weak Wi-Fi for App-Based Intercoms
Many homeowners assume a video intercom will work because their phone connects to Wi-Fi near the front door. However, gates, walls and distance can weaken signal.
For reliable performance, wired data or a properly designed network may be better.
No Door Hardware Assessment
Remote unlocking depends on the lock, latch, frame and power. If these are not assessed, the intercom may communicate well but fail to release the door smoothly.
Poor User Training
Even a good system can frustrate users if they do not know how to answer calls, add users, adjust volume or troubleshoot app notifications.
A proper handover should be part of the job.
Maintenance After Intercom Installation
Intercoms do not need heavy maintenance, but they should not be ignored.
For homes, check the camera lens, app notifications and door release every few months. Clean the outdoor station gently and remove spider webs, dust or salt residue.
For businesses and apartments, schedule regular checks. Test call quality, door release, backup procedures, user lists and access permissions. Also remove old users when staff or residents leave.
If the system records images or call logs, review retention settings. Keeping data longer than needed may create privacy and administration issues.
Troubleshooting Common Intercom Problems
The Intercom Rings, but the Door Does Not Unlock
This may be a lock power issue, relay issue, door alignment problem or configuration fault. Check whether the lock clicks when release is pressed. If not, call a technician.
Video Is Blurry or Washed Out
Clean the lens first. Then check sun glare, night lighting and camera angle. If the image is still poor, the camera settings or unit location may need adjustment.
Mobile App Calls Are Delayed
This can happen because of weak internet, phone notification settings, vendor cloud delay or poor Wi-Fi at the intercom. Test on mobile data and Wi-Fi to isolate the issue.
Visitors Cannot Hear Clearly
Wind, traffic, rain and mounting location can affect audio. Some systems allow microphone or speaker adjustment. However, physical placement may still be the main cause.
Apartment Residents Miss Calls
Check handset settings, app registration, call routing and building system programming. In multi-unit systems, one incorrect configuration can affect a single unit while others work normally.
People Also Ask: Intercom Installation in Australia
How much does intercom installation cost in Australia?
The cost depends on the system type, cabling, number of entry points, door hardware and site complexity. A simple home setup costs less than an apartment or commercial system with multiple users and controlled door release. For an accurate estimate, arrange a site inspection and ask for an itemised scope.
Do I need a licensed installer for intercom installation?
In many cases, yes. If the work involves communications cabling, fixed electrical wiring or door hardware integration, it may need a registered cabler, licensed electrician or qualified security technician. Always check the installer’s credentials for the specific work.
Is a wired intercom better than a wireless intercom?
A wired intercom is usually more reliable for permanent installations because it does not depend on wireless signal strength. However, wireless intercoms can be useful where cabling is difficult or expensive. The best choice depends on the building, distance, signal quality and budget.
Can an intercom connect to my mobile phone?
Yes, many modern IP and GSM intercoms can call mobile phones or send app notifications. However, they rely on internet, Wi-Fi or mobile coverage. Therefore, the installer should test connectivity before completing the installation.
Can I install an intercom in an apartment?
Yes, but apartment intercom installation may need strata or owners corporation approval if it affects common property. This can include foyers, external walls, risers, cabling pathways and shared doors. Always confirm approval before work starts.
Expert Q&A: High-Value Intercom Installation Questions
1. What should I prepare before getting an intercom installation quote?
Prepare a list of entry points, photos of the door or gate, details of existing locks, Wi-Fi information and your preferred answering method. Also note whether you want mobile app access, video recording, keypad entry or integration with access control. This helps the installer quote accurately.
2. What is the best intercom installation option for a front gate?
For front gates, the best option often depends on distance from the house, available conduit, power, mobile coverage and gate motor compatibility. A wired or IP gate intercom is usually strong when cabling is available. GSM intercoms can suit rural or long-driveway properties with good mobile coverage.
3. Can intercom installation be added to existing access control?
Yes, many intercoms can integrate with access control systems, electric strikes, maglocks and gate controllers. However, compatibility must be checked before installation. The installer should confirm relay outputs, lock power, controller inputs and fail-safe or fail-secure behaviour.
4. What is the difference between video intercom installation and CCTV installation?
A video intercom is mainly for communication and controlled entry at a door or gate. CCTV is mainly for broader monitoring and recording. Some video intercoms can record snapshots or clips, but they are not a full substitute for a planned CCTV system.
5. How long does intercom installation take?
A simple home intercom may be completed relatively quickly when cabling and power are straightforward. More complex systems, such as gate intercoms, commercial sites and apartment buildings, can take longer because they involve cabling, door hardware, programming, access coordination and testing. Any timeframe should be confirmed after a site inspection.
Conclusion
Intercom installation can make an Australian property safer, easier to manage and more convenient, but the best system is not always the most expensive or the newest. It is the one that fits the entry point, cabling, network, door hardware, privacy needs and daily workflow.
Before choosing a system, decide who needs to answer calls, where visitors will stand, whether remote unlocking is required and what cabling or network support is available. Then use appropriately qualified professionals for regulated cabling, electrical and security work.
For homes, strata properties and businesses, a well-planned intercom installation can improve access control without making everyday entry difficult. Start with a site-based assessment, ask for a clear scope and choose a solution that balances reliability, usability and long-term support.